In the digital age, where speed and efficiency are paramount, cache plays a crucial role in enhancing the performance of your laptop. Cache is a temporary storage area that stores frequently accessed data or program information to expedite future access. It helps your laptop respond quickly to your commands by reducing the need to retrieve data from slower storage devices like hard drives or the internet.
However, over time, cache files can accumulate and take up valuable disk space, potentially slowing down your laptop. This article will guide you through the process of clearing cache on both Windows and Mac laptops, improving their overall performance.
Why Clear Cache?
Before delving into the methods to clear cache, it’s important to understand why you might want to do this. Over time, cache files can become outdated or corrupted, leading to issues such as slow system performance, application crashes, or glitches. Clearing cache can help in the following ways:
Read Also: How To Create AI Art 2024
- Freeing Up Disk Space: Cache files can accumulate and take up a significant amount of storage space on your laptop’s hard drive or SSD. Clearing cache can free up this space for more important files and applications.
- Improving Performance: Clearing cache can improve your laptop’s speed and responsiveness, as it eliminates the need for the system to sift through outdated or redundant data.
- Resolving Software Issues: If you’re encountering problems with specific applications, clearing their cache can often resolve issues related to functionality or performance.
Now, let’s explore the methods for clearing cache on both Windows and Mac laptops.
Clean Cache Using Windows Disk Cleanup
Step 1: Access Disk Cleanup
- Press
Win + Sto open the Windows search bar. - Type “Disk Cleanup” and click on the matching result.
Step 2: Select the Drive
- Disk Cleanup will prompt you to select a drive. Choose the drive where you want to clean the cache (usually the system drive, C:).
- Click “OK.”
Step 3: Select Cache Categories
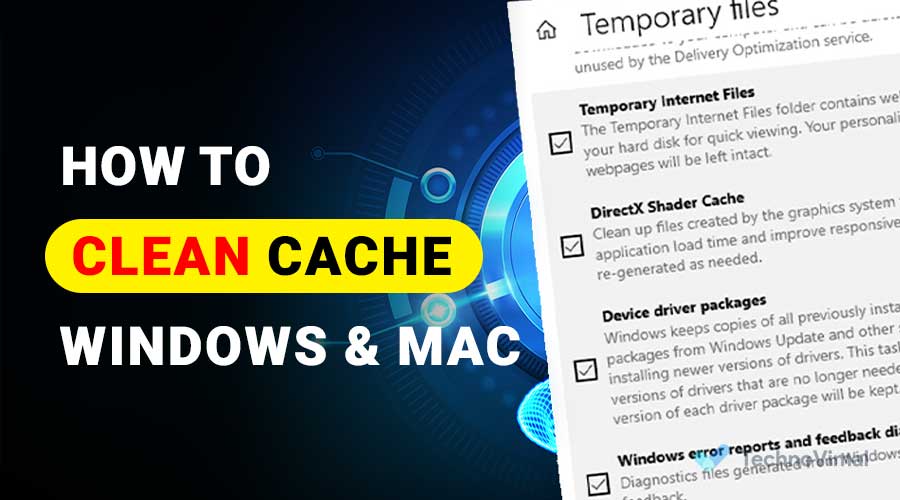
- In the Disk Cleanup window, you’ll see a list of file categories you can clean. Check the boxes for the cache categories you want to remove, such as “Temporary Internet Files,” “Temporary Files,” and “Thumbnails.”
- Click “OK.”
Step 4: Confirm Deletion
- A confirmation prompt will appear. Click “Delete Files” to proceed.
- Disk Cleanup will clear the selected cache files.
Clean Cache in Windows Without Applications
1. Clear Browser Cache
- For web browsers like Chrome, Firefox, or Edge, open the browser settings, navigate to the privacy or history section, and clear browsing data, including cache.
2. Clear Windows Store Cache
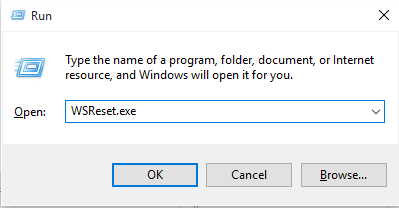
- Open Command Prompt as an administrator and run the following commands one by one:
wsreset.exe3. Clear Windows Update Cache
- Open Command Prompt as an administrator and run the following commands one by one:
net stop wuauserv
net stop cryptSvc
net stop bits
net stop msiserver
ren C:\Windows\SoftwareDistribution SoftwareDistribution.old
ren C:\Windows\System32\catroot2 catroot2.old
net start wuauserv
net start cryptSvc
net start bits
net start msiserver
Clean Cache on Mac Without Application
1. Clear Browser Cache on Safari
- Open Safari.
- Click “Safari” in the menu bar.
- Select “Clear History…”
- Choose the desired time range and click “Clear History.”
2. Clear System Cache
- Open “Finder.”
- Press
Shift + Cmd + Gto open the “Go to Folder” dialog. - Enter
/Library/Cachesand click “Go.” - Select and delete cache files and folders as needed.
3. Clear User Cache
- Open “Finder.”
- Press
Shift + Cmd + Gand enter~/Library/Caches. - Delete cache files and folders for specific applications or system components.
Cleaning Cache with Additional Applications
There are third-party applications available for both Windows and Mac that can streamline the cache cleaning process. These applications offer more control and convenience when it comes to managing cache files. Some popular options include CCleaner for Windows and CleanMyMac for Mac.
Conclusion
In today’s fast-paced digital world, cache is an essential component that contributes to the speedy performance of your laptop. However, as cache files accumulate, they can hinder your laptop’s performance and take up valuable storage space. Knowing how to clear cache on your Windows or Mac laptop is a valuable skill that can help you maintain optimal performance and resolve various software-related issues.
By following the methods outlined in this article, you can efficiently clear cache, whether you prefer using built-in tools like Windows Disk Cleanup or performing manual cache clearance for specific applications. Additionally, if you prefer a more comprehensive cache management solution, third-party applications are available to simplify the process.
Clearing cache regularly is a proactive approach to ensuring that your laptop operates smoothly and efficiently, allowing you to make the most of your digital experience without slowdowns or glitches. So, don’t hesitate to free up that valuable disk space and boost your laptop’s performance by clearing cache today.
